


The challenge: managing software stacks at scale
As a system administrator, you know that deploying and maintaining Linux distributions can be painful.
Keeping the kernel up to date is already an ordeal. But you also need to keep track of patching and upgrading packages and their dependencies deployed across multiple systems.
It’s the perfect recipe for a migraine — and it gets worse!
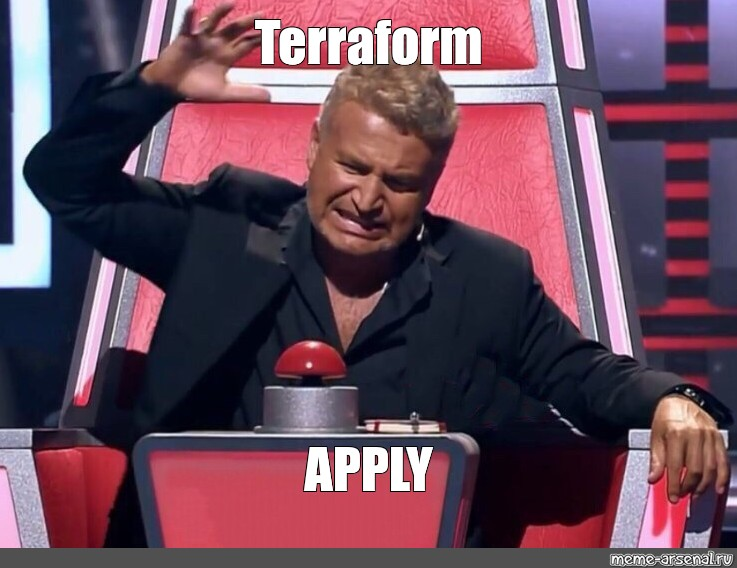
These systems are likely to be managed as snowflakes. Each one is subtly different after weeks and months of incremental changes… changes made using custom Terraform scripts written by Joe. Joe just left the company. And, of course, he didn’t document any of his work.
Sound familiar?
IaC? It’s not enough to prevent snowflakes
Even with the advent of infrastructure-as-code (IaC) paradigms, like Terraform, Linux systems often end up in different states. It’s impossible to guarantee that a sysadmin has not manually upgraded software packages or changed system settings.
Ideally, all systems across the estate stay completely in line with policy, with the same Linux distro configuration. Think stormtroopers, not snowflakes! Only user and business data should vary from one system to another.
An OS built for containers and Kubernetes: the container OS
Today we look for Linux distributions designed not just to eliminate snowflakes. We need them to be optimized for containerized, cloud-native workloads that scale quickly on demand, using Kubernetes.
Kubernetes is considered by many as the de facto “cloud OS”. This means there are now two OSs to manage:
- One that is locally significant, the underlying Linux distribution
- One, Kubernetes, that is operated as a cluster of nodes
In this scenario, it’s important to keep the base OS as stable and predictable as possible. That’s the consistency we were talking about. All systems in the Kubernetes cluster must have the same foundations to operate with the same reliability, performance, and security.
But you also have to deal with the Kubernetes requirements and make sure that your chosen Linux distribution is configured accordingly.
This means fine-tuning the kernel, setting up extra software dependencies, configuring extra services, and so on. Before you start the actual Kubernetes configuration process, you’ve already burned three days working on the base OS.
You can save all this time if you instead adopt a container OS that’s optimized for Kubernetes.
It’s worth noting that NIST strongly encourages the use of a container-specific OS to run cloud-native workloads, for security reasons.
According to it, “attack surfaces are typically much smaller than they would be with a general purpose host OS, so there are fewer opportunities to attack and compromise a container-specific host OS”.
In practice, container OSs are often deployed when resources are limited, especially in edge computing environments. This is why they’re often lightweight, and paired with lightweight (under 100MB) Kubernetes distributions like K3S.
Let’s compare six major container OSs
In this article we’ll help you find the best OS for Kubernetes.
What about K3OS? It’s been perhaps the most popular option as a container-specific OS. But its future is unclear and many users are now looking for a k3OS alternative.
We’ll cover:
- CoreOS, the pioneer cloud-native OS
- Flatcar Container Linux, the successor
- K3OS, the lightweight
- Bottlerocket, the Amazonian
- Talos, the CNCF-certified installer
- Kairos, the factory
This is a long article, with in-depth analysis and how-to instructions for each OS. So feel free to jump to the OS you’re interested in, or check out the comparison matrix. Short on time? The conclusion is your TL;DR summary.
CoreOS, the pioneer cloud-native OS
Arguably the first container OS was CoreOS. The CoreOS team made its first release in 2013, even before Kubernetes was created. But its goal was identical: focus on security at scale with container orchestration.
CoreOS Linux was built with many security features, such as automatic updates and a read-only file system. This type of operating system is considered “immutable”. CoreOS also included a vulnerability scanner and a container firewall.
Large enterprise companies embraced CoreOS and it was especially popular in the field of cloud-native computing.
In 2018, Red Hat acquired the company, merging CoreOS into its own service portfolio.
Meanwhile, the Kinvolk team saw an opportunity for an open-source drop-in replacement for CoreOS. This led to Flatcar Container Linux.
Flatcar Container Linux, the successor
After RedHat acquired CoreOS, Kinvolk forked the codebase to continue its development as a container OS. The resulting Flatcar Container Linux provides a minimal OS optimized for containers.
Like CoreOS Linux, Flatcar is immutable. It’s configurable during the initial boot process, and any further modifications are not persistent. Only user data in specific directories persists across reboots. The OS is bootstrapped via a curated image, and an additional layer of customization allows the user to configure options and services via cloud-init.
Two main components are responsible for image customization: Ignition and Butane.
The Ignition configuration is the JSON schema that powers the customization of the container OS, and Butane is the user-friendly YAML counterpart.
You can convert a Butane configuration into native Ignition JSON quickly and easily with the provided CLI tool.
It is also possible to automate actions executed after the first boot using systemd unit files. For example, you can install K3S, or even better, deploy a three-node K3S Kubernetes cluster.
Let's take a look at how to do exactly that:
- Create the Butane YAML file for the control-plane node. It defines how to run the K3S installation script and build the cluster
- Create the Butane YAML file for the two worker nodes. It defines how to run the K3S installation script and join the cluster
- Transpile the Butane configuration into Ignition JSON documents
- For every node, deploy the Flatcar cloud image with the Ignition configuration ingested as user data
- Verify that the Kubernetes cluster is formed and healthy
Let’s take the GCP Flatcar cloud image as an example, using gcloud to configure and deploy the compute instances. The process described below is similar to on-premises deployments using VMware vSphere or bare-metal servers, with the caveat that injecting the cloud-init configuration file is not as straightforward as in the cloud.
Configuring Ignition
The user generates a machine-readable JSON document via the Butane and Ignition tools. Butane allows you to customize the OS using YAML as opposed to working with JSON directly. The final JSON ignition file is obtained by converting the YAML file into ignition via a simple command. It is then passed to the user-data option of the cloud providers.
Our Butane configuration for the control plane is the following:
#butane_cp.yaml
First, we download K3S from https://get.k3s.io and we create a systemd unit file to install K3S and initialize the Kubernetes cluster. Note that we use a predefined token that appears in plaintext, which is not ideal, especially if the configuration is committed to a repo.
For the worker nodes:
#butane_worker.yaml
Note that “cp_node_ip” must be replaced with the actual IP of the control plane node. Consequently, the control-plane node has to be provisioned before the worker nodes.
With the Butane container image, you can quickly create Ignition configuration files without having to install any software on your device. Here's how to do it:
Deploying the Kubernetes cluster
GCP enables the deployment of workloads in a flash with the gcloud command. Here's a brief example for deploying our three nodes — don't forget that the control-plane node must be deployed first so you can obtain its internal IP address!
Take note of the internal IP — 10.128.0.125 in our case — and replace the corresponding section in the Butane worker configuration. Once the Ignition configuration is generated, you can use the following commands to deploy the worker nodes:
You can then log in to the control plane node and check that the Kubernetes cluster is healthy with the following command:
Summary
Flatcar Container Linux is a powerful platform for building custom images and adding software such as K3S for Kubernetes edge use cases.
It offers immutability with minimal effort from users who want to deploy a container-specialized OS at scale. And it comes with exciting features such as automatic system updates and active/passive partitioning capabilities that make scalability easy. It is worth mentioning that ISOs are downloadable when deploying to bare metal servers, making Flatcar a good fit for Kubernetes edge use cases.
However, it is missing out-of-the-box automation to build Kubernetes clusters and does not provide any Kubernetes-native framework to manage the cluster lifecycle. It surely falls into the DIY bucket, wherein the management of the container OS is included, but the Kubernetes layer is completely disconnected.
For anyone looking to manage a serious Kubernetes deployment — we need to keep looking.
K3OS, the lightweight
K3OS is a lightweight immutable OS designed specifically for K3S clusters. It was first introduced by Rancher Labs in 2018 and was officially released in 2019 as an open-source project.
The operating system was designed with a strict minimal approach, containing only the fundamental components to power Kubernetes clusters. The light weight of k3OS and K3S brings many benefits such as reduced attack surfaces, shorter boot times, and a more streamlined filesystem.
Its small footprint and usability have made it a popular choice for running Kubernetes clusters at the edge. It also has Kubernetes-native capabilities, since the k3OS lifecycle can be managed via kubectl once a cluster is bootstrapped.
However, the latest release was published in October 2021, which shows that its development has been stopped and users are now looking at other alternatives (example of other comments here).
But if you still want to play with k3OS, let's install a three-node Kubernetes cluster in VMware vSphere, which will act as our virtual edge location.
At a high level, these are the required steps:
- Download the k3OS ISO
- Create a k3OS cloud-init configuration file including K3S configuration and make it available via HTTP
- Create a new VM and mount the ISO as a virtual CD-ROM
- Boot the image, run the k3OS installer and specify the k3OS cloud-init configuration location
- Verify that the Kubernetes cluster is formed and healthy after repeating the steps (from step two) for every node.
Deploying k3OS with Kubernetes in VMware vSphere
First, download the ISO for K3OS v0.21.5-k3s2r1 using curl:
Then, create three cloud-init configuration files following the model below:
#cloud_init_cp
For every node, replace the hostname accordingly. Additionally, you must modify the k3OS options of the workers to match the following snippet:
#cloud_init_workers
Note that “cp_node_ip” must be replaced with the actual IP of the control plane node. Consequently, the control-plane node has to be provisioned before the worker nodes.
After completing the process, you’ll be left with three distinct cloud-init configuration files that must be hosted on an HTTP server for access. In our example, the files are named cloud_init_n1, cloud_init_n2, and cloud_init_n3.
Let’s provision the control-plane node. We’ll assume that you already know how to perform the following tasks:
- Serve the cloud-init files via an HTTP server
- Create three Linux VMs in VMware vSphere and mount the ISO. In our example, we have deployed the nodes with 2 vCPUs, 8GB of RAM and a 20GB disk drive.
After creating the VMs and mounting the K3OS ISO image, access the console with the username “rancher” and no password.
Start with the control-plane node. You can now install k3OS with the interactive installer by executing the command:
Note that the cloud-init file location must be changed to the appropriate URL.
Next, check that you can log in with the credentials: rancher/k3os via the VM console or SSH. Verify that the Kubernetes cluster is running by executing the following command:
Repeat the process for the two remaining worker nodes. Don't forget to assign the appropriate cloud-init configuration files.
Finally, once the process is completed, check the Kubernetes cluster health status. Connect to the control-plane node via SSH or remote console and run the following commands:
Summary
K3OS was created to underpin the popular, lightweight K3S Kubernetes distribution. With a minimalist and immutable OS, it offers a small footprint that allows for safe scalability.
In addition, you can easily upgrade it using the Kubernetes API once the cluster is running. Indeed, the integration of k3OS with the Rancher system upgrade controller provides a Kubernetes-native solution to upgrade the nodes by extending the Kubernetes API. It enables the k3OS nodes to automatically upgrade from the latest GitHub release by leveraging its own Kubernetes cluster capabilities. This makes it a true Kubernetes-native process.
However, customizing the k3OS image and automating its configuration along with the Kubernetes cluster deployment is complex. Also, there is no Kubernetes-native way to generate these images or easily deploy them to public clouds.
While these features may have been some interesting next steps for the project, k3OS has not been updated for over a year, with no new release or GitHub issues being addressed. So it’s hard to recommend using k3OS in any production environment today!
What’s next?
Bottlerocket, the Amazonian
Bottlerocket is another open-source Linux-based operating system specifically designed for running containerized workloads on Kubernetes clusters.
Amazon Web Services (AWS) created Bottlerocket in 2020 in the Rust programming language, and it’s integrated with a variety of AWS services, such as Elastic Kubernetes Service (EKS), Elastic Container Service (ECS), Fargate, EC2 instances, Graviton2, and Amazon Inspector.
While it’s easy to deploy in the AWS cloud or in VMware vSphere, provisioning Bottlerocket on bare-metal servers or in edge environments is a lot more difficult. (You can find the full guide here).
The system is solely configurable via API, with secure out-of-band access methods. There’s no SSH server or even a shell. Updates are based on active/standby partitions swap, for a quick and reliable process.
In addition, Bottlerocket supports multiple ‘variants’, corresponding to a set of supported integrations and features, such as Kubernetes, ECS, Nvidia GPU, and many more.
It’s also possible to build your own Bottlerocket images from curated variants rather than directly downloading the artifacts. This requires Rust and the Docker BuildKit. Finally, it is worth noting that there’s no variant that includes K3S at the time of writing.
Let’s get our hands dirty by deploying three Kubernetes worker nodes in vSphere again. This time the OS image is directly provided as an OVA, which simplifies the process and enables easy integration with cloud-init user data.
We are going to follow the high-level steps below:
- Upload the OVA to vCenter
- Configure the govc environment variables
- Create three Bottlerocket VMs from a template
- Create a Bottlerocket configuration TOML file
- Inject the Bottlerocket user data via the “guestinfo” interface
- Verify that the VMs have joined the Kubernetes cluster as worker nodes
Prerequisites
Kubernetes control plane
In VMware vSphere, Bottlerocket can only run as a worker node. This means that an existing control-plane node must already be in place. You can easily bootstrap a control-plane node using kubeadm. Refer to this documentation.
Govc
Govc is a command line tool leveraging the vSphere Golang bindings to connect to vCenter and perform operational tasks on vSphere objects, such as ESXi hosts or VMs. We will use it to perform most of the operations. You can download govc from the GitHub release page.
You must configure your govc environment variables. You can use the following snippet as a reference and adapt it to your needs:
Rust, Cargo and tuftool
TUF (The Update Framework) is a set of protocols and tools that aims to secure software update systems. It helps developers protect their software and users from various attack vectors, such as malware and malicious actors.
One of the tools that you can use to create and manage TUF repos is tuftool. A command-line utility written in Rust, tuftool can help developers generate and sign TUF repos.
It does this by creating and managing collections of metadata files that describe the software and updates available for a particular system. By signing these metadata files with digital signatures, tuftool ensures the authenticity and integrity of the updates that are distributed to users. In this way, tuftool can help make software update systems more secure.
Bottlerocket uses tuftool to generate and sign TUF metadata files and to create TUF repositories as part of its update process. This helps ensure the authenticity and integrity of the updates that are distributed to its users.
Cargo is the package manager for the Rust programming language. It manages dependencies and builds Rust projects.
Run the following commands to install Rust and Cargo on your system:
Install Rust and Cargo:
Install tuftool using Cargo:
Deploy three Bottlerocket VMs in vSphere
First, download and check the Bottlerocket root role, which is used by tuftool to verify the OVA:
If you are on a Mac, use “shasum -a 512” instead of “shasum512”
Fetch the desired OVA variant locally:
Generate the OVA specification file:
The JSON spec will look similar to the following:
Add the value of $GOVC_NETWORK to the “Network” key:
Upload the OVA into vSphere:
Mark the uploaded artifact as vCenter Template:
Create three VMs from that template (Don’t start them yet!):
Configure Bottlerocket
You should now have 3 Bottlerocket VMs deployed in your vCenter. The next step consists of configuring the user data and injecting it into the image using the “guestinfo” interface.
Configure the following environment variables from the station you have used to deploy the control-plane node with kubeadm:
Create the user data file:
Inject the user data into your VMs:
For each VM, check that the user data has been set by executing the following command:
Finally, verify that the Kubernetes cluster is healthy, with three more workers added to the cluster:
Also check that your CNI and kube-proxy have been successfully deployed on the new nodes by the DaemonSet controller:
Summary
Bottlerocket is a minimalist container-specific operating system that is focused on security. You can run Bottlerocket in various environments, but it is primarily aimed at AWS public cloud and integrates with a variety of AWS services. When it comes to container orchestration, Bottlerocket supports Kubernetes, but not K3S.
You cannot directly manage the Kubernetes nodes via a terminal or SSH. The Bottlerocket guest can only be accessed via the admin or control containers, which are extra components that must be installed within a separate containerd instance. In the case of VMware vSphere deployments, these containers are not available by default, and you need to explicitly enable their provisioning in the user data TOML configuration file.
The Bottlerocket Kubernetes operator takes care of system updates, while images are secured by TUF. This is a completely Kubernetes-native workflow that follows the same principles as the Rancher system upgrade controller. The existing image is replaced by the new one, and it has rollback capabilities should a failure occur during the boot process.
There are, however, a couple of hiccups when deploying Bottlerocket at the edge, where the environment typically relies on virtual (VMware or KVM/libvirt equivalent) or bare-metal servers.
As you may have noticed, the Kubernetes image we used for Bottlerocket was labeled “vmware-k8s-1.24”, but the patch version is not mentioned. Once Bottlerocket joins the cluster, the full version is visible on the node (1.24.6). This leads to a "chicken or the egg" issue since we ideally want to match the patch version of the control plane with that of the nodes.
In our case, the control plane is running Kubernetes 1.24.0, and the worker nodes are running Kubernetes 1.24.6. Therefore, the next step is to upgrade the control plane to Kubernetes 1.24.6; however, as a good practice, it is recommended to first upgrade the control plane, followed by the worker nodes. From an operational perspective, this is far from convenient, especially at scale.
Finally, since the control plane is running a different version of the Linux kernel and is based on a different image, it is best to configure a taint on the control-plane nodes. This way, only the desired pods will be scheduled on these nodes.
Talos, the CNCF certified installer
Talos is a minimalist Linux distribution designed from the ground up to run Kubernetes. Its main purpose is to bring Kubernetes principles to the operating system layer. It introduces a declarative way of managing both the OS and the Kubernetes native components live, allowing for a streamlined and efficient way of dealing with operations and navigating through the lifecycle of the entire system. It was released in 2018 ( pre-release) by Sidero Labs and is entirely open-source.
Talos completely removes SSH and console access in favor of API management. You can deploy Talos in any hyperscaler clouds, on bare-metal servers and virtualized systems. The tool also provides an easy way to deploy a local Talos cluster using the docker runtime by executing the command “talosctl cluster create”
It also includes a Cluster API (CAPI) provider, the “Cluster API Bootstrap Provider Talos” or CABPT. Its role is to generate bootstrap configurations for machines and reconcile the updated resources with CAPI. There is a separate provider for the control plane configuration, the Cluster API Control Plane Provider Talos (CACPPT).
The “talostctl” command-line interface allows you to interact with the Talos nodes and the Kubernetes cluster without requiring any terminal or ssh connection. It leverages the API along with Kubernetes CRDs. This enables frictionless lifecycle management for all the Kubernetes infrastructure components.
Let’s go a bit more in detail and, as before, deploy a Kubernetes cluster in vSphere. As Talos natively provides a built-in Virtual IP (VIP) for the control plane, we are going to deploy a Kubernetes HA cluster, with three control-plane nodes and two workers.
The high-level workflow to perform this task is:
- Generate the base machine configurations for the control-plane and worker nodes, and choose a VIP to be used for the control plane
- Configure the govc environment variables
- Upload the OVA to vCenter
- Deploy and start the control-plane nodes
- Bootstrap the cluster and start the worker nodes
Prepare the machine configurations
First, you must create a JSON patch configuration file to customize the Talos configuration for all the nodes.
Download the JSON patch template that will be used to customize the base template provided by the talosctl utility.
Fill out the VIP section of the file as displayed below:
Generate the YAML machine configuration file by executing the following command:
Note that you must replace the IP address specified in the command line with the VIP configured for your environment.
This command creates the configuration file for both the worker nodes and the control-plane nodes. It also generates the certificates required for your cluster. The configuration will be later injected into every node using the “guestinfo” govc interface.
In addition, should you wish to change the Kubernetes components versions, you can manually edit the YAML files and replace them with the desired value. Remember to align the versions in both the worker and control-plane configuration files.
Deploy the Talos VMs in vCenter
First, make sure that your govc environment variables are set. You can go back to the Bottlerocket section for more details on how to configure govc. Run the following command to check your govc variables:
Since three control-plane nodes and two workers will be deployed, a basic govc scripting will make things faster.
Let’s create a vSphere content library to host the OVA:
Download the OVA:
Import the OVA to the library:
You should see the OVA uploading into your vCenter.
The next step is to deploy the control-plane nodes. Let’s do this within a loop:
Inject Talos configuration into the VMs via guestinfo and customize the hardware configuration (don’t start them yet):
Adjust the ephemeral disk size:
Finally, start the control-plane nodes:
Repeat the same operations for the worker nodes. The operations are summarized below:
Bootstrap the cluster
After booting up the control-plane nodes, the etcd leader must be elected. Open a remote console to one of the control-plane nodes and wait until you see the following message:
.png)
Take note of the IP address displayed on the screen. In this example, the address is 10.10.160.170
Bootstrap the cluster by executing the following command:
Finally, retrieve the kubeconfig file and check that the cluster is healthy:
You can notice that the VMware tools are being installed as a Kubernetes Daemonset. This is a detail, but quite useful when you need to access machine-specific information such as the IP address of the node from the VMware console or the govc CLI. That Daemonset enables this capability. This requires another configuration step, where you have to provide the Talos credentials, as detailed below:
You should now see the Daemonset deployed with a pod running on every node:
Summary
Talos is a very opinionated immutable operating system that provides off-the-shelf Kubernetes environments. If you are a Kubernetes aficionado and want to operate your cluster with a strong security posture, Talos offers you an array of operations through the talosctl CLI in conjunction with declarative inputs. For example, you can upgrade your entire cluster in an orchestrated fashion by running “talosctl upgrade-k8s --to 1.26.1”, where 1.26.1 is the updated Kubernetes version.
Talos also supports disk encryption, NVIDIA GPU, and Fabric Manager, and allows you to manage the lifecycle of your Public Key Infrastructure (PKI). Disk encryption is useful when running Talos at the edge. It protects the data in case of a lost or stolen disk. However, It is not designed to protect against attacks where physical access to the machine, including the drive, is available.
Talos is very efficient at building secured Kubernetes clusters in a jiffy. It provides built-in management features to facilitate cluster lifecycle management.
For example, it deploys highly available Kubernetes clusters without any external load balancer by relying on a floating virtual IP and allows for secure connection via Wireguard peer discovery on the public Internet. In case of a node failure, one of the remaining control-plane nodes takes ownership of the VIP.
Also, the etcd cluster is automatically bootstrapped during cluster initialization, and scaling the control plane up and down is very easy.
The system footprint is very small, with an 80MB SquashFS image size. This drastically reduces the attack surface of the cluster. However, the opinionated approach of Talos also means that it has some drawbacks and limitations:
- It doesn’t support K3S, although the reduced OS size compensates for the total footprint difference.
- Image customization is limited to kernel modules and root filesystem content.
- As the kernel footprint is reduced, so is the list of supported hardware and specific kernel functions.
- Some aspects of the management of the system are more complex than traditional Kubernetes environments.
As a result, Talos is well-suited for specific scenarios where the trade-off between flexibility and secure off-the-shelf distribution is acceptable.
Kairos, the factory
Over the last couple of years, an interesting pattern has emerged in Kubernetes. It entails using Kubernetes as an extensible API to add automation capabilities.
For example, Cluster API allows for the deployment of Kubernetes clusters by making cluster logical components first-class citizens in Kubernetes. So, from an existing Kubernetes cluster, you can bootstrap a new Kubernetes cluster and delegate its management once it has been deployed.
Kairos operates on the same principles. It allows you to build and customize immutable operating system images and Kubernetes clusters by extending the Kubernetes API. It delivers these capabilities via a custom controller watching for Kairos custom resources. The controller takes appropriate actions based on the CRUD operations performed on these resources.
Kairos acts as a Kubernetes ‘factory’ producing K3S clusters underpinned by the immutable OS of your choice.
As opposed to the other solutions described previously, Kairos is a meta-distribution, meaning that it has the ability to transform any existing Linux distribution into an immutable operating system. The only requirement is an OCI-compliant container image of that system.
Kairos has the ability to build a full-fledged operating system from that container image. Alternatively, Kairos also delivers pre-built images for every release.
Another key feature of Kairos is AuroraBoot. It allows you to bootstrap Kairos images directly from the network by teaming up with your DHCP server. Currently, Aurora runs as a Docker container, but will shortly be available as a Kubernetes Pod. With Aurora, all you need is a configuration file specifying the container image you want to deploy as your Kubernetes cluster OS, along with the cloud-init configuration.
Kairos can also coordinate Kubernetes cluster deployments. It means that it can deploy a HA Kubernetes cluster on-demand with no other setting required than the desired number of control-plane nodes and the virtual IP used by kube-vip. Combine this approach with Aurora, and you can automatically deploy an HA cluster via the network in a flash.
Let’s use the Kairos factory to build a highly available five-node Kubernetes cluster in VMware vSphere, composed of three control-plane nodes and two workers. Two options are available as to the base OS: you can use a pre-built Kairos image distributed as part of the released artifacts, or you can customize the OS by providing your own Dockerfile. In the example below, we will build a custom image from the openSUSE base image.
The high-level workflow to build the K3S HA cluster is the following:
- Customize the OS container image and push it to a container registry
- Create the Aurora configuration file
- Run the Aurora container on the same network as the target Kubernetes cluster
- Create 5 VMs in VMware vCenter and boot them up from the network
Customize the Kairos container image
In this example, the customization is quite simple. We are going to add the mtr package to the existing Kairos OpenSUSE image. Mtr is a networking tool that combines ping and traceroute to diagnose the network. Let’s build the Dockerfile:
#Dockerfile
Build the container by using docker and push the image to Docker hub:
Note that you must replace the registry and image names with your own values. The custom Kairos container OS is now available at docker.io/vfiftyfive/nic-custom-kairos
Create the AuroraBoot configuration file
The Aurora configuration is a YAML file comprising the Kairos container image details and the cloud-init section. We will add the requirements to automatically build a HA K3S cluster. For this, we need to enable Kairos’s unique P2P feature, K3S HA, define the VIP, the network token, and the number of control-plane nodes:
#aurora.yaml
A couple of things to note from the configuration file above:
- You can use your personal SSH key instead of a github SSH key. For this, replace “github: YOUR_ID” with your SSH public key.
- The network token is obtained with the following command:
It is worth noting that Aurora also supports passing the configuration file via URL. For more information on Aurora settings, check the documentation page.
Next, wait for the image available on the network. The following line will be displayed from the container logs:
Create and start the vSphere VMs
As previously, we will create and boot the VMs using govc and the corresponding environment variables. Refer to the previous sections to initialize the govc environment. Then, run the following command to create five VMs from scratch:
All VMs will boot over the network and after a couple of minutes, Kairos will be installed and the Kubernetes cluster ready. Let’s check the health of the cluster.
First, log in to one the nodes of the cluster (get the IP from the vCenter screen). If kubectl is installed on your local machine, you can directly copy the configuration from the node. Alternatively, you can run kubectl from any node where Kairos is installed by executing the following commands:
Summary
Kairos offers more than just a container-specialized OS. By using its components, you can create a factory that transforms any Linux distribution into an immutable operating system and customize additional software on top.
Rather than being opinionated about a particular container-specialized OS, Kairos gives the flexibility to leverage your operating system of choice. Once you have chosen the distribution, Kairos releases an immutable artifact that you can deploy as a complete operating system underpinning Kubernetes clusters.
Kairos relies on OCI container registries to build the OS from a container image. This simplifies the OS build and update processes, as it is achieved by using Dockerfiles and a container runtime.
Kairos delivers the resulting artifact via an ISO image that is crafted via multiple options: Kubernetes CRDs, PXE boot, or manually by mounting the ISO image on the target server.
Kairos natively supports Kubernetes. More specifically, it delivers K3S clusters, making it a perfect choice for Kubernete edge use cases.
In that context, Kairos also has the ability to self-coordinate the bootstrap of Kubernetes clusters, without the need for any central server. The election process defines the role of every node, and is completely distributed via a shared ledger.
As a consequence, whether you are looking to deploy a single-node cluster, or a large HA cluster with multiple control-plane nodes, the process is identical. Consequently, it drastically reduces cluster build, while also allowing for better scalability.
In terms of security, Kairos optionally provides disk encryption utilizing the local TPM chip. Multiple scenarios are supported:
- Encryption keys can be stored within the TPM chip
- After encryption with the TPM key pair, an external server can be used to store encrypted passphrases for user-data partitions
- A KMS server can be used to store passphrases and return them to the nodes after a TPM challenge.
Finally, Kairos streamlines feature configuration using a cloud-config format, compatible with cloud-init. It provides templatization capabilities for dynamic configuration, simplifying automation and integration with CI/CD pipelines.
Kairos was initially created for Kubernetes edge operations, but it's also a great alternative to run Kubernetes clusters on bare-metal or virtual servers in the datacenter.
Its versatility and selection of base Linux distributions make Kairos an ideal solution for enterprise customers who are bound by certain vendors and operating systems, but still want to take advantage of container-specialized OS, immutability and automation at scale.
Comparison matrix
In this article, we compared several container-specialized OS alternatives to k3OS, with Kubernetes in mind as the container orchestrator. The table below summarizes the main features of each solution in that context:
Conclusion (TL;DR)
Kubernetes is a complex distributed system, and you cannot afford to build your clusters on top of a poor foundation. Although Kubernetes is often considered the “cloud operating system”, it is not an operating system per se. It needs an OS that delivers strong and stable support through immutability and specialization.
Immutability provides that declarative-driven state that empowers all modern infrastructure tools such as cloud automation frameworks and GitOps patterns.
So why would it be different for your Kubernetes OS? It may be less important in the datacenter than at the edge, depending on your operational model. However, it does prevent you from deploying snowflakes and help keep track of changes more easily. This leads to better performance predictability, higher scalability, and ultimately a more successful path to application modernization.
For edge use cases, most operations are performed remotely, with little or no qualified staff locally present. So, features like atomic updates, easy rollback, limited writable filesystem and extra security are key. All are made possible by adopting immutable operating systems.
Among the solutions we compared in this article, only Kairos allows you to turn any Linux operating system into an immutable OS. This may be the preferred option if you want to keep using your favorite distribution.
Alternatively, you can choose from a few curated operating systems that provide immutability out of the box. Most of the solutions we’ve described are opinionated, with their benefits and drawbacks. You can refer to the matrix above to compare their key characteristics.
Container-specialized immutable operating systems are only one piece of the puzzle. As you deploy multiple clusters across different locations, especially at the edge, you also need a central management plane to help with standardization, ease of deployment and operations.
Palette Edge from Spectro Cloud is built on top of Kairos and adds central management capabilities. It provides an extra layer of abstraction with Cluster Profiles, which allows you to create standardized Kubernetes cluster configurations and deploy anywhere when associating the desired edge machines.
But don’t take my word for it! You can try Palette Edge for free and compare it to the other solutions mentioned in this article or check out the docs.
.webp)


.svg)

.webp)
